Flow Teaching Block dashboards for Professional Services staff
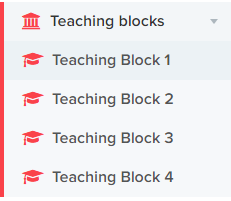
1. Within the menu, go to ‘Teaching Blocks’ located in Check-In Flow and select the teaching block number you wish to view.
There are four teaching blocks per academic year. These are calculated depending on the semester pattern each year and can sometimes vary. For example in year 2023/24 teaching blocks have been assigned as follows:
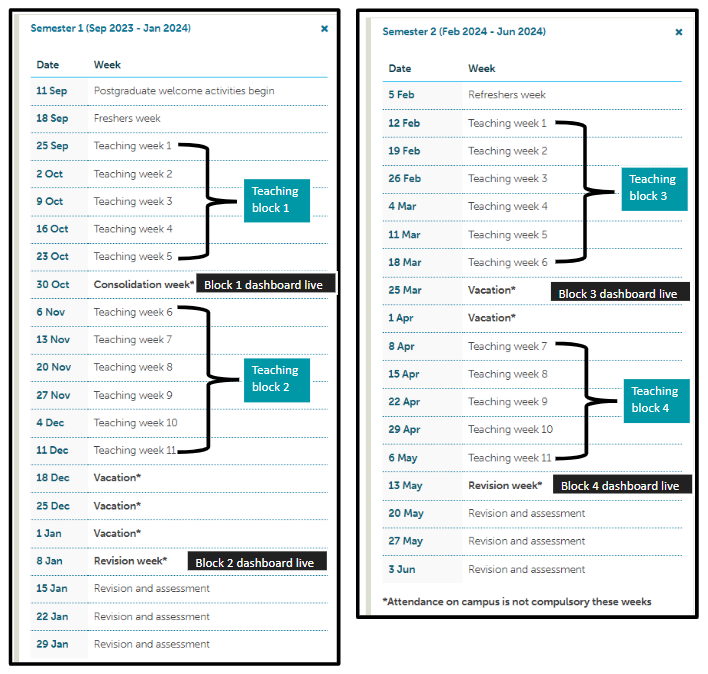
2. Students appearing on Teaching Block dashboards are all those who did not meet the minimum threshold and are those students considered most in need of welfare and wellbeing support. The criteria is available within the Student Academic Engagement and Wellbeing Procedure.
3. Within a teaching block dashboard, there’s a number of columns and filters available to interpret the data:
- Various student details: Student Number, Username, Student name, Email.
- Attendance percentage: This is the percentage of events attended versus events possible to attend within that block. As the year progresses, an overall percentage can be gained through the Reporting suite, but the percentage here is the score for each block only.
- Missed weeks count: This is the number of weeks within the block where the minimum threshold has not been met.
- UKVI: Yes/No
- Repeater: Yes/No to whether this student has appeared on a previous consecutive block.
- Status: This is the case status, adjusted by staff as each student case is worked through.
- Central Services acknowledged: set by the Academic Engagement Manager once a case has been referred
- Email sent: an email has been sent from the Check-In system
- Flag for Central Services: staff would like central services support for this student
- In progress: a case has been assigned to a member of staff
- New (initial state): a student who is appearing on the list for the first time (they were not on the previous list of all Block 1 students)
- No further action: a case that requires no email to be sent
- Other welfare support: staff are happy to manage this student's ongoing support locally and do not require Central Services support
- Other email sent: an email has been sent outside of the Check-In system
- Repeater (initial state): a student who is appearing on a second consecutive teaching block
- UKVI (initial state): a UKVI student who is appearing on the list for the first time for information only (they were not on the previous list of all Block 1 students)
- UKVI Repeater (initial state): a UKVI student who is appearing on a second consecutive teaching block
- Department: in alphabetical order, any departmental affiliation this student has, including as a staff member
- Course: Cohort followed by course name
- Cohort Code: Cohort followed by cohort group
- Assignee: the staff member assigned to the case
- Status: Student Status code taken from SITS. Only ‘active’ status students appear on teaching block dashboards. Students who have withdrawn or are on LOA are excluded but can be found in the Reporting Suite.
4. The process to work through each teaching block dashboard varies depending on whether you are actioning Block 1 or Blocks 2 onwards ‘New’ or ‘Repeater’ students. This overview image explains the different steps and actions:
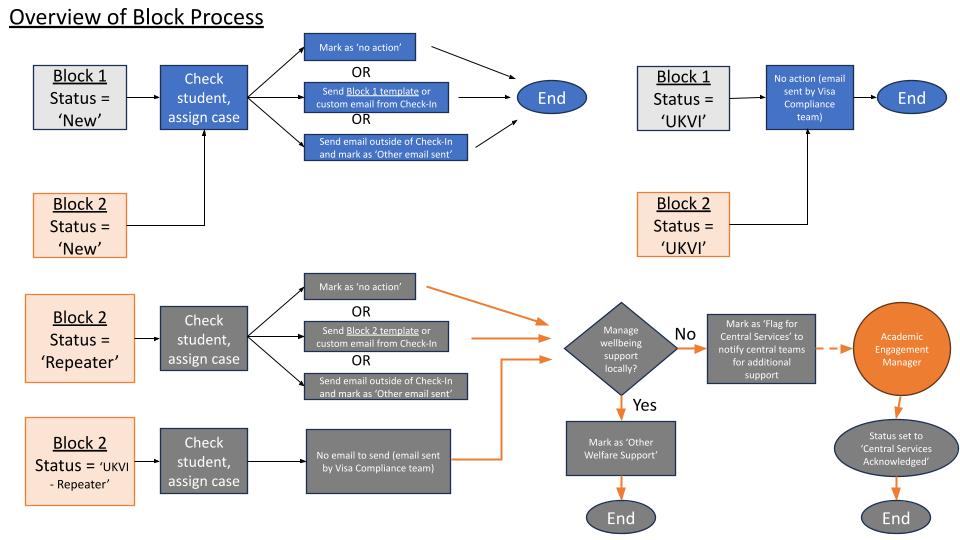
5. Please prioritise ‘Repeater’ students in Blocks 2+, followed by students with the lowest Attendance Percentage first, as these are ones considered most in need of welfare and wellbeing support.
Step by step to work through a teaching block dashboard
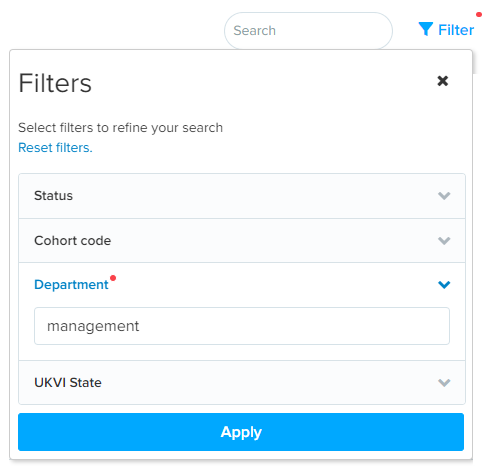
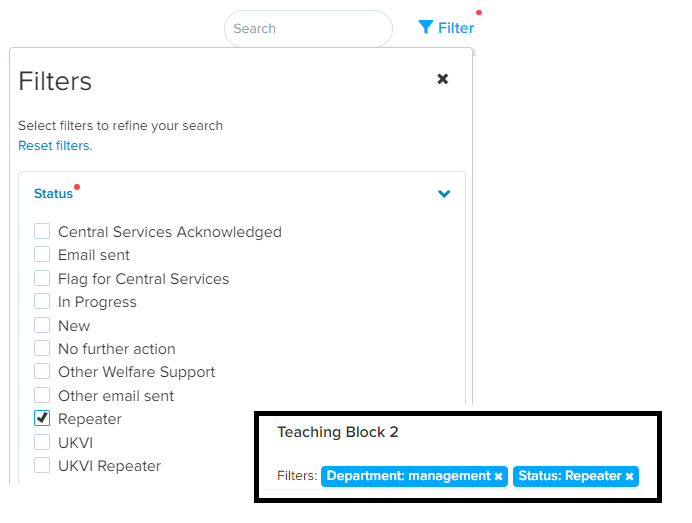
1. To begin working on a student case, first click on ‘Filter’ in the top right and open the ‘Department’ filter box. In here type in the name of your department. It is best to search for one keyword that is unique to your department, eg ‘management’ instead of ‘The York Management School’, but typing ‘soc’ will show ‘Social Work’ as well as ‘Sociology’. Click ‘Apply’. This will filter the list to show all the students who are affiliated with your department.
Note: some students will show who are in more than one department. At the time of writing, a primary department filter is not yet released. To determine which is the student’s home department (and the department responsible for this student’s case) from those in the list, look at the ‘Course’ column to see which course they’re on.
2. Next, sort the Attendance Percentage column by lowest first.

If on Block 2+, you will want to also use the Filter to show only those in ‘Repeater’ or ‘UKVI Repeater’ status.
3. To see what the action was in the previous block, click on the student’s name. If a student was put in ‘no action’ in the previous block, you may want to check to see if this student has mitigating circumstances for low engagement.
Note: at the time of writing, if a student has a Student Support Plan, is already being seen by Central Services (eg Support to Study), or has had agreed sickness absence, these students may still appear on the dashboard. Once additional development to include more data points is in place, these will be filtered out automatically.
For Departments which have been adding authorised absences to the system manually, those students have been taken into account and not shown on the dashboard if the trigger is in a week they had an absence. As this is an optional process, in departments not doing this you may find a lot of the Repeaters which were marked as ‘no further action’ in Block 1 could have reappeared due to department absences or self-certs that the system doesn’t know about yet.
4. Once you are satisfied there are no reasons why this student has a low engagement percentage, click on the Student Number to open the case workflow.
5. Within this student case view, you can see a detailed timetable of which events the student has attended (green), missed (red), or unobserved events that didn’t use Check-In (grey). It is possible to scroll back and forth between different Block timetables to see an attendance history using the < > arrows.
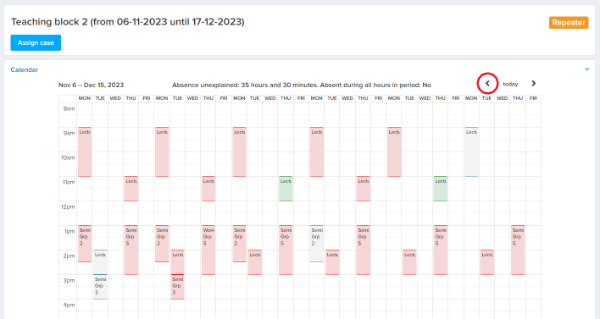
6. Additional information on the student is also displayed on the right hand side including a total ‘Missed Weeks Count’ from all blocks. The student Status is useful to check here as this is a dynamic field and a student may have become LOA since the list was originally generated.
7. To work the case and progress to the next status, click ‘Assign case’ and then press the ‘Assign case’ button again in the pop up. This will set the Status to ‘in progress’ and your username will be added as the ‘Assignee’. You can also assign cases to other individuals.
Note: cases cannot be reassigned once this button has been pressed but it is still possible for others to work through cases that aren’t assigned to them. If someone else changes a status, it is shown in the History:

8. Once a case is in progress, the next action buttons become available:

Here you can:
a. ‘Send Check-In email’, which sends the recommended template from the system’s noreply email address. There is a different template for ‘New’ and ‘Repeater’ students.
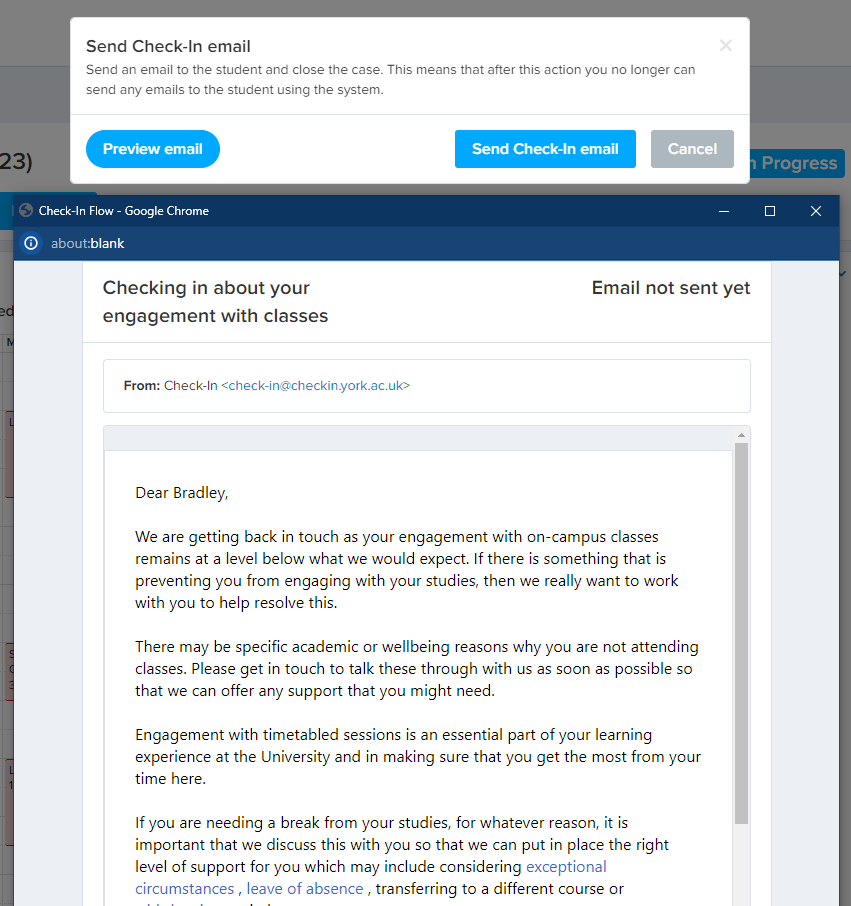
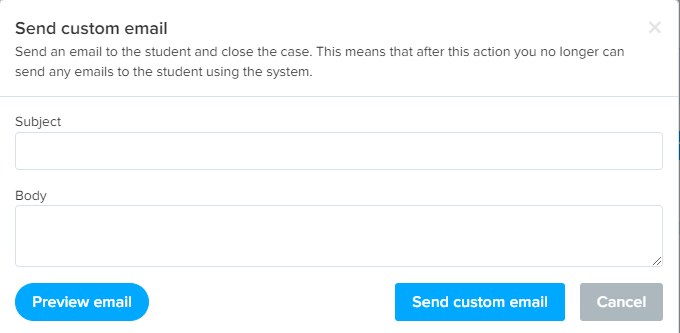
b. ‘Send custom email’, which opens up the text box to send our recommended template with your own department’s contact details at the bottom.
Note: when pasting text with links into the body here you must use the HTML scripted template provided or the links will not work when the email is sent.
c. Select ‘Other email sent’, which tells the Academic Engagement Manager that you have sent your own email locally from another inbox.
d. Select ‘No action’ to indicate there is a reason this student does not require any further support.
9. For Block 1 and Block 2+ ‘New’ status students, that is the end of the process.
For Block 2 onwards ‘Repeaters’ and ‘UKVI Repeaters’:
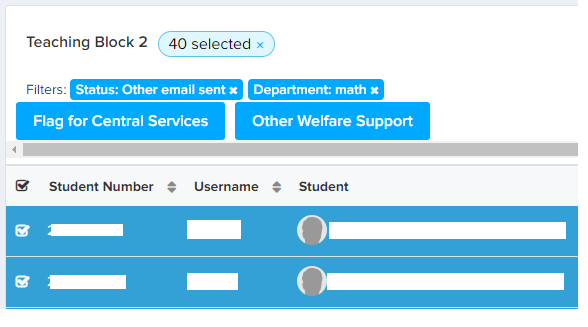
a. Select ‘Flag for Central Services’ if you require additional welfare or wellbeing support for this student. Central Services will endeavour to make a phone call to the student.
b. Select ‘Other Welfare Support’ to inform the Academic Engagement Manager that you will manage ongoing student support locally, or you know this student is already in progress with a central service (eg Support to Study).

10. The Academic Engagement Manager will mark cases as ‘Acknowledged’ once the referral has taken place. The type of support that will be offered at this stage is covered in other guidance.
UKVI students
Student Visa holders will receive their emails from the Visa Compliance team using templates very similar to the ones in Check-In, with additional Visa compliance information. Departments therefore do not need to contact Visa students regarding their visa attendance requirements. However, Student Visa holders do still need welfare and wellbeing support. In Block 1 (or as a first appearance in other blocks) there’s no action to take. In Block 2+ (where they are a repeater) please follow step 9 above.
Note: The UKVI column is a dynamic field which is updated regularly to reflect a student’s current circumstances. When teaching block dashboards are generated, the system will set the initial Case status depending on the UKVI value at the time of block generation. For example, on 3 November for Block 1, if the student had [UKVI= yes] then their initial Case status would be 'UKVI'. If their status was [UKVI= no] on those dates then their initial status would be 'New'. If this student stopped being sponsored after the block generation date, you could have a scenario where a student has [UKVI=Yes] in the UKVI column but their Case status is 'New' or vice versa. For this reason, it is advised to use the 'UKVI State' filter and not to only rely on Case statuses to hide students where [UKVI= Yes].
Applying actions in bulk and the minimum requirement of departments
The minimum requirement of departments is to ensure all of their students are set to an end state.
An end state for ‘New’ students is one of the statuses in step 8. An end state for ‘Repeaters’ and ‘UKVI Repeaters’ is one of the statuses in step 9.
Some departments will want to send emails using a bulk email tool or from their own inbox instead of Check-In. This is fine but please make sure all of your ‘New’ students are set in bulk to ‘Other email sent’. For ‘Repeaters’ there’s also a requirement for you to mark all of your students as ‘Other Welfare Support’ in bulk if you don’t want us to refer these students to Central Services.
1. To assign in bulk, the starting status must be the same. Using the filters show all students in status ‘New’ and then in addition show all for your department by typing in the department name.
Caution: once a status has been set it cannot be undone. Make sure you have filtered by your department correctly before bulk assigning.
2. Then use the select all tick box in the top left corner on the column header.
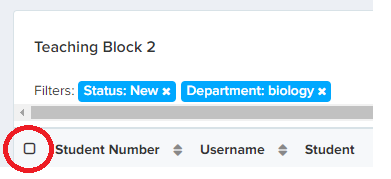
3. Assign them all to yourself by typing in your username.
4. Then bulk highlight the same set again with the filter of ‘In Progress’ and the ability to set to ‘other email sent’ or ‘no action’ is displayed.
Caution: it will not only highlight the ones assigned to you, but all cases ‘In Progress’ in your department. Make sure to deselect any assigned to others if you do not want to change those statuses too.

5. For ‘Repeater’ and ‘UKVI Repeater’ students follow steps 1-4 again and then additionally set the students to either ‘Other Welfare Support’ or ‘Flag for Central Services’ depending on which is required.
Note: make sure to sort the ‘Repeater’ column so only those marked as ‘yes’ are set to one of these statuses.
Download our quick card for a printable version of these instructions:

